Showing posts with label ricotta cheese. Show all posts

Tuesday, October 30, 2018

Homemade Cannoli

Good Evening my friends!
This blog has been a little hard to get out to you.  As you know I also have a YouTube channel and this recipe is also going there.  What you also know is I am 2 weeks out of a cornea transplant.  I am only able to sit at the computer about 20 minutes at a time before I have to rest my eye.  However, since nobody has time for that kind of nonsense, I have my eye patch on and I am getting this out to you this evening come hell or high water!


 My daughter in law has literally been asking me to make these with her for 4 years.  Yes, seriously.  I don't know what caused me to dive into this 6 days out of surgery but I did.  It was a fun day spent together and the outcome was nothing short of heaven.  Jersey girls looking for real cannoli in the midwest doesn't usually work out so well for us.  No pudding, no custard.  The fakery must be stopped!  This filling is true sweetened ricotta, with a custard like base.  It is perfection.  Just the way we love them!


Use chocolate chips or don't.  Use dried pieces of fruit or don't.  Use pistachios, or don't.  These are your cannolis!  I like mine plain, but we did most with chocolate chips!  It isn't a hard process but it is a bit of a lengthy one.  You WILL NEED CANNOLI FORMS!  You can find them almost anywhere these days!

Shells:
2 cups Flour
2 TBSP Butter
2 TBSP Sugar (White Granulated)
2 TBSP Unsweetened Cocoa
1 TSP Cinnamon
1/2 cup Seltzer Water or Marsala Wine

(You can do this in a bowl with a fork or pastry cutter, but I am using my food processor)
In your food processor add, flour, butter, sugar, cocoa and cinnamon.  Pule until ingredients are in crumbs.  Add in seltzer water slowly, pulsiing until mixture is combined.  Your dough should be wet enough to hold together but not sticky.  If it is a little dry add a bit more water, if it is sticky add just a wee bit more flour, it is pretty forgiving that way.  Wrap dough in plastic wrap and refrigerate for 30 minutes to rest.

Filling:
2 cups Milk
3/4 cup Cornstarch
2 cups Sugar
2 LBS Ricotta Cheese
2 Tsp Vanilla Extract
1-2 cups Mini Chocolate Chips

NOTE: This will make extra filling.  I will put a link at the end for a recipe to use it for, or freeze it for later cannoli making!
In a large pot add milk, cornstarch and sugar.  Slowly bring to a boil and stir constantly until thickened.  Transfer to a bowl and let sit, covered, in the refrigerator until COMPLETELY cooled!  When it is cooled, place mixture into the bowl of your stand mixer or use a hand mixer and add ricotta cheese and vanilla.  Mix until smooth and well combined.  I used the whisk attachment on mine for about 30 seconds at the end.  Place back in the refrigerator.

To make the shells, roll out your dough as thin as possible without it ripping.  Using a cookie cutter or glass, cut circles out of the dough.  Wrap around your cannoli forms and using an egg wash, brush the sides that lay on each other to seal your shell!  Continue with all of your dough or as with as many forms as you have.

Heat oil to 350 degrees and fry a few at a time until golden brown.  About 4-6 minutes.  Place on a paper towel lined cookie sheet, let sit for a couple of minutes and remove form.  You may need to use tongs, if they are still hot.  Make sure to let the shells cool completely to make sure they are as done and hardened as they should be (the first batch) so you can adjust if needed!

When all of your shells are fried and cooled, using a piping bag or food storage bag with the corner cut off to fill your cannolis!  Make sure to add a few chocolate chips to the ends so they can be seen!

ENJOY!
Buon Appetito!


SAVE THAT EXTRA FILLING!  Freeze it and use it for the holidays or later with this recipe!
Mini Cannoli Bites


Monday, September 17, 2018

Ricotta Cheese Stuffed Tomatoes

Happy End of Summer!  It is basically fall in my opinion.  I mean I finally broke out all my pumpkin decor the other day and with a complete "bite me summer" attitude I raised the pumpkin decor with pride and joy!


As we all know, the end of the summer means end of gardens.  Boo!  But those last few tomatoes, the last few of this and that all needs used up.  Waste not, want not, right?!  This recipe is perfect for those little tomatoes you don't want to bother canning.  Use these for a party, for a side dish, or little snacks for anything!

It is an easy recipe, and I did include a video.  Please don't forget to hit subscribe on my YouTube Channel here


Enjoy this easy recipe ad if you feel so inclined, make your own ricotta cheese using my recipe here!

This recipe will actually make 12-16 individual tomatoes.

Tomatoes
1/3 cup Ricotta Cheese
2 T. grated Parmesan Cheese
1/2 tsp Italian Seasoning
1/4 tsp Garlic Powder
1/8 tsp salt
up to 1tsp milk

Combine all ingredients except milk.  Add just enough milk to make filling the tomatoes easy.  Set aside.

Prepare your tomatoes by cutting a whole out of the middle.  Do not let it go clear to the bottom or your filling will run out.  If you want to use a clean finger or thumb an widen the area to be filled with cheese feel free.

Feel free to sprinkle some basil, red paper flakes, or salt on top before serving!


ENJOY


Wednesday, September 7, 2016

Cheese Stuffed Shells

 Here we are again!  I hope your day has been great, and happy!  I love this time when we get together to share food.  I especially enjoy sharing family favorites with you.  It is hard to not share them all at once, and spread them out.  This is one I have never shared, and it is just your everyday run of the mill stuffed shells.  My family loves them and this is what I would consider a quick weeknight meal. If you are a meal planner/prepper, have your sauce made, shells boiled and all of your grated cheeses put together in one large resealable bag.  When the night comes you want to make it, it is not much more than just assembly.


This makes about 20 shells.  You can only cook that many or cook them all and eat the leftovers with butter and salt and pepper!  That is what my husband lives for when I make extra pasta.

You will notice I use what some of you may consider a lot of salt.  I don't find that the saltiness of Parmesan cheese hits the same notes as actual salt seasoning in a dish.  I find ricotta needs plenty of seasoning and that is just what I do.  When you divide that salt out among a large casserole, I think you will live.  If you want to omit it, please do, or cut it back, please do that as well.  You have to adjust things to what is good for your family.  I won't mind, in fact, I will welcome it !  Lets get started on this basic stuffed shell recipe that your family will love!

Oh wait!  You can also shred some provolone to use in this.  I saw some of those cheese blends at the store include a provolone/mozzarella combination....um, YUM.  OK, now we are ready.


1/2-1 full box of jumbo shells, cooked per package directions
15 oz. ricotta cheese
8 oz.  shredded mozzarella cheese (hold out 1/4 cup)
8 oz. shredded Parmesan cheese (hold out 1/4 cup)
1 T. Italian seasoning
1 tsp. onion powder
1 tsp. garlic powder
1 1/2 tsp. salt
1/4 tsp. black pepper
4 cups marinara sauce (divided)
1 can diced tomatoes
2 T. sugar

Preheat your oven to 350 degrees.  Cook shells according to box direction, drain and run under cold water until they are completely cool.  Let sit and drain while you mix up the cheese filling.  In a bowl combine, ricotta cheese, shredded mozzarella, shredded Parmesan, Italian seasoning, onion powder, garlic powder, salt and pepper.


Mix to combine.  Use about 1/2 cup of your marinara (just plain) to dump in the bottom of the pan.  Spread it around as it will keep the shells from sticking.  Fill your shells with a teaspoon.  This mixture will fill about 20 shells.  You can cook the whole package or just the 20.  Fill and place into the baking dish.


Continue until your filling is gone.  In the same bowl as the filling (hey I am not about using as many dishes as possible ya know?) Pour in the rest of the marinara and the diced tomatoes UN drained.  Add in sugar and stir.  Carefully pour over the shells as evenly as possible. 


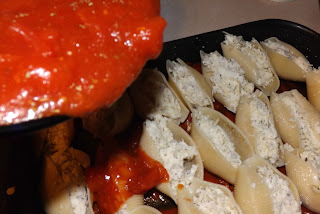
Spread out the sauce with a spoon, and use the cheese you held back to sprinkle on top!  Now, confession time..........  I used like, a lot more mozz.  The photo below show only Parmesan but I decided I wanted more mozzarella on top!


ENJOY my friends!


Saturday, January 24, 2015

500th Post!!! Italian Ricotta Cheesecake

Good morning ladies and gents!  Another dessert!  WOOHOO!  Seriously, this is getting a BIT out of control.  I mean, these may not go live back to back but I have literally made 4 desserts in less than a week.  It just happened that way.  Good thing I have lots of family to share with! 


Before I get started, take a look at the piece I cut out and the place I cut it from.  Seriously?  I can't even cut a proper triangle?  Very sad.  BUT interesting, right? HA!

Oh and one more TINY thing.  This is officially my 500th post!  What does this mean to me?  It means 500 times I have sat down at my computer to share food, fun, love, and memories.  I have made loving fun of nearly everyone in my family, and I have been able to share it with you, my Chefwannabe family, the extension of my real family.  Thank you for every bit of support, every ounce of advice, every teaspoon of criticism, even ever single gulp of pride.  I love you all, I respect you all, and you are pure joy in my life.  How many people get to be so blessed?  I count myself as one of those who are!  Crazy love to you every single one of you!

This ricotta cheesecake has been so long coming.  I have eaten it several times, back in the land of my Italian family and friends!  HOLLA South Jersey!  I have just tried to make it myself.  You will see it is so easy to make.  I mean, I used to be all intimidated by cheesecake.  Shhyeeaaahh, not anymore.  I had no recipe for this cheesecake.  In fact, I picked a part a few recipes I found and ended up ditching half the ingredients I came across.  I decided to fly with it, go with my gut on this one and it worked.  I mean, come on food bloggers and home cooks alike, how many times do you "get it" on the first try?  Exactly!.  And  then I decided to take the "no water bath" part from the Cake Boss and see if it really worked.  I figured if it cracks, and tastes like crap I learned two lessons in one day! 

Now, for anyone has never had a ricotta cheesecake.  Do not expect the texture of a regular cheesecake.  It is the same slight sweet flavor, I omitted the lemon, (ugh with the lemons already) and probably left out the most vital Italian ingredients.  But this turned out awesome and I had to share it with you.  The consistency is a bit grainy, maybe not grainy, hmm...what is it.  It has texture, where regular cheesecake it just smooth.  This is much lighter than a New York cheesecake so if you don't like the dense cheesecake this might be for you.  If you don't like light cheesecakes this may STILL be for you! 

Give it a try, and if you feel so inclined, add the lemon zest, but you aren't going to find it in my recipe!

Now, go, make this!

32 oz. whole milk ricotta cheese
4 eggs, separated whites and yolks
2 T. heavy cream
2 cups cup granulated sugar
1 T. vanilla extract

Preheat your oven to 450 degrees F.  In your stand mixer or with a hand mixer, beat egg whites to a medium peak.  If they go a bit further, no biggie, just get them to at least medium peaks and set aside. 


This part I do in the food processor, but you can easily just do it with a bowl and a spoon.  In a large bowl or the food processor, add in ricotta cheese, egg yolks, heavy cream, sugar and vanilla.  Mix until combined, or process until smooth and combined. 

 
Transfer to a large bowl if you need to.  Carefully, fold the egg whites into the ricotta cheese filling, in 3 editions.  You don't want to lose all of that beautiful fluff!  When it is completely combined, butter a 9 inch spring for pan WELL.  Bottom and sides.  Pour the cheesecake mixture into the spring form pan, and then give it a slight tap or two on the counter to get out any air bubbles.
 
 
Now place into the oven and IMMEDIATELY turn your oven down to 350.  Let back 55 minutes. and then shut the oven off.  DO NOT, I repeat DO NOT open the door and it shouldn't crack!  No need for the pain in the rear water bath!  When the 55 minutes is up, slightly crack the oven door, and shut off the oven, let the cheesecake sit in the oven until it comes to room temperature.  Chill for at least 2 hours.  I chilled mine overnight. 

Look Ma, no cracks!
Run a knife around the edges, and remove the sides of your spring form pan.  I heavy hand the powdered sugar on top, because, well, I like too!

Enjoy this delicious and unique dessert that will make you look like a rock star!


Wednesday, September 24, 2014

Baked Ricotta Pasta

Are you a fan of the ricotta?  I find it much like cilantro, you either are, or you are not, few are in between.  I am, however, the exception.  Sometimes I love it, something I don't, just depends on the dish I suppose.

I needed a quick side dish the other night.  I had a few leftovers from manicotti in my fridge and went to work in my science lab.  Actually, let's be honest, it is more like a sofa and a notebook but, none the less I came up with this pasta dish that my husband thought rocked, and I thought was pretty darn tasty too.  It is easy and quick, definitely a recipe to have in your arsenal of "OMG, they will be here for dinner WHEN?" recipes. 


Like that old retro casserole?  Rocks my world.

Anyway, you will need:

8 oz. short cut pasta
1 cup ricotta cheese
1/2 cup grated Parmesan cheese
4 T. butter
1/2 tsp. salt
1/2 tsp. black pepper
2 egg yolks

Preheat your oven to 350 degrees F.  While that is happening, cook your pasta in well salted water according to package directions.  Cook it on the low end of the recommended time.  When it is done, drain, and put back in the pot.  Add in all of your other ingredients.  Let butter melt, and mix gently until smooth.  Pour into a casserole dish and top with some breadcrumbs if you like!  Bake for 20 minutes.  This should serve 4 adults, easily.  I LOVE having a new side dish!  I hope you do as well!

ENJOY!


Friday, April 18, 2014

Mini Cannoli Bites

It may or may not shock you to know I am not the biggest fan of the cannoli.  Not the traditional way anyway.  I am not a huge ricotta fan and sweetening it, doesn't feel any better to my taste buds!  HOWEVER, my husband IS and I wanted to make a little cheater version, simply because making homemade shells just wasn't in my days plan.  I think these turned out really good AND furthermore, I think they would be perfect for a party!  You have the sweet cream right inside an edible bowl.  Perfection.  No dirty dishes for this girl!


Now don't ask why because I can't explain but I would NOT use a mixer, hand held or a stand mixer to mix the ricotta cheese.  I don't know why, but when you just use a spoon, it doesn't become as thin.  We don't want cannoli sauce here.  When you use a mixer it changes things.  So please, just use a spoon or else, I can't guarantee you will be happy with the outcome.  Although even if it is a bit thin you ARE putting it into a pie crust bowl!  Right?

Enjoy these and make sure to only fill as many as you will need, and don't fill until just before serving! 

15 ounces ricotta cheese
3/4 cup powdered sugar
1 tsp. vanilla
mini chocolate chips

Combine all ingredients until smooth, refrigerate until ready to serve.

Pie Crust (I used premade or you can find my fab pie crust recipe here.
1/4 cup sugar
1 tbsp. cinnamon

Combine sugar and cinnamon until mixed and set aside.  Remove your pie crust and roll out.  Using a small glass or cookie cutter, cut out circles that are big enough to set down into mini muffin cups!  I would say a 2-3 inch in diameter cutter or glass will work.  One pie crust yielded 24 mini cups for me, so you will need 2 pie crusts to make an entire batch.  If you only want 24, half the ricotta mixture recipe. 

Preheat your oven to 425 F.  Spray your mini muffin tins with nonstick spray.  Taking your cinnamon sugar mixture, sprinkle your pie crust circles liberally and then take your circle push it down into one of your mini muffin cups careful not to stretch it a lot.  Just put it in and push it down, so you form a cup. Repeat with all of your circles.  Bake for 10 minutes and then let sit until cooled.  Remove cups carefully and fill with your ricotta cream using a spoon or pastry bag and sprinkle the top with mini chocolate chips.

These should not be filled until just before they are ready to be served!  If you fill your pastry bag it will make much quicker work of it and you can keep it cool before filling.  Just my 2 cents!

If you love cannoli, you will love these little bites of pure bliss!!


Wednesday, July 17, 2013

Homemade Ricotta Cheese

Good evening friends!  Hoping this finds you all doing well and enjoying your evening!!


This cheese making thing, is getting a little out of control.  First hubs and I made mozzarella cheese, we have made it several times.  He has been on me about making ricotta cheese forever.  He LOVES ricotta cheese.  Not my favorite, but I get that he enjoys it.... immensely. 

I wish I had 1.00 for every single time I put him off about this.  I used every excuse in the book, from "it will be to hard" to "why can't we just buy it in the store" to "NO, I am NOT making ricotta".  Well finally he was done taking no for an answer.  I mean, he is a HUSBAND, shouldn't he be able to take NO for an answer? :)  Anyway, I gave in.  We looked up all kinds of recipes and techniques.  I can't believe the variance from super easy recipes to super involved recipes.  We ended up going with a recipe from epicurious.com for our first ever ricotta cheese making adventure.  It was easy, took no special equipment, other than needing to pick up some cheesecloth we were ready to go.

I will tell you in advance, this cheese was SO incredibly delicious, I will likely never buy it in the store again.  Not only was it delicious, but I knew exactly all 4 things that went in it!  How can you argue with that?!?

You will need:
1 large pot
cheesecloth
colander
1 1/2 tsp salt
1 gallon whole milk
2 cups heavy cream
6 tbsp. fresh squeezed lemon juice.  (do NOT use the stuff in a bottle)

Place cheese cloth into the colander and set in the sink.  Make sure you cut the cheese cloth bigger than you need so it stays put and cover the entire colander

In a large pot, add in milk, cream, and salt.  Bring slowly to a rolling boil.  This might take a bit!  Be patient. 

When it is at a rolling boil, add in the lemon juice and turn off the burner.  Let it sit for approx. 2-3 minutes.  You will see it curdling immediately.


When you think it is curdled as it should be, pour into cheese cloth lined colander and let drain. 


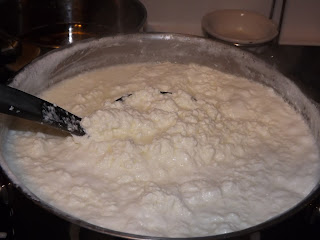
The longer you let it sit and drain the dryer your ricotta will be. 

This yields 1 qt of ricotta.  (at least it did for us).  Refrigerate at least 4-6 hours.  Let it cool completely and then use however you choose.  Use it savory, use it sweet, the options are endless.  This is the best thing goin' and I can't WAIT to make it again and again!  Funny how things change, eh?

Your "admittedly likes making ricotta" Chefwannabe


Saturday, November 12, 2011

Christmas Cookie Teaser!! Ricotta Cookies!

First off on a side note, I am in Nebraska.  I moved here from Jersey.  I wore a PENN State sweatshirt into Walmart, the Huskers are playing them today.  Oh the looks!  I was in all my glory.  My sister was sure her tires would be slashed when we got done.  Oh these NE people and their beloved Huskers.  Weird!


Is it really almost Thanksgiving?  Acck!  You know that means Christmas is right around the corner.   I was i the store today and was greeted by a 20 foot Christmas tree and Elvis singing, "Blue Christmas".  Not just some nice instrumental holiday music, no, they brought out the big guns, ELVIS.  Ok, I get it!


I decided it was time to give you an easy, delicious cookie recipe.  Some people start making them so early and in case you are one of those people, here is a new one!  For the record I am NOT a ricotta cheese fan.  My husband could eat it with a spoon right out of the container and for the record, HE HAS.  I am not a huge fan of ricotta in cannolis either but,  I have been making these cookies for a long time.  They are sort of like the softest, most delicious sugar cookie you have ever had but they are so much better.  It makes a large batch and trust me when I tell you the dough looks *and tastes* good enough to eat the whole thing.  I mean, not that I ever eat cookie dough...just tasted some one time a few years ago..... :)  It is this gorgeous, creamy white and looks like thick whipped cream!


Let me go over a few things you could change up if you needed or wanted too.  Now, you COULD use cream cheese instead of Ricotta.  Now, I don't know WHY you would do that, but in an emergency situation I would approve it. :)  You could also use half cream cheese and half ricotta.  Like I said, these are RICOTTA cookies so that is what I recommend.  Also for the glaze on top, you could use lemon or orange juice in place of the milk, or add some zest.  You can also ALWAYS use a flavored liquid creamer as well.  It's up to you, I am a traditional girl, so tradition is what I roll with.  Also I will give you the amount of milk I use but it really is your taste, if you want to drizzle it or make it thicker like a frosting.


RICOTTA COOKIES

  • 2 cups white sugar
  • 1 cup butter, softened
  • 15 ounces ricotta cheese
  • 2 teaspoons vanilla extract
  • 2 eggs
  • 4 cups all-purpose flour
  • 2 tablespoons baking powder
  • 1 teaspoon salt
  • 1 1/2 cups confectioners' sugar
  • 3 tablespoons milk, juice, or flavored creamer

  • Preheat oven to 350 degrees F (175 degrees C). Line baking sheets with parchment paper.

  • In a large bow, with the mixer a low speed, beat the sugar and butter until combined. Increase speed to high and beat until light and fluffy (about 5 minutes) This step is very important, no cheating! Reduce speed to medium and beat in the ricotta, vanilla and eggs.

  • Add flour, baking powder and salt; beat until dough forms.

  • Drop dough by level tablespoons,I use a small cookie scoop,  about 2 inches apart; onto the prepared baking sheets. Bake for about 15 minutes or until cookies are very lightly golden (cookies will be soft). With spatula, remove cookies to wire rack to cool.

  • When cookies are cool, prepare icing. In small bowl, stir confectioners' sugar and milk until smooth. With small spreader, spread icing on cookies or dip.

Dipping cookies
Enjoy these delicious cookies!  I am sending some into work with my husband tonight!!

Your "it's almost Christmas cookie time" chefwannabe
Chris


Monday, October 31, 2011

Lasagna Rollups with Alfredo...

Grab a bucket, hurry!  Your drool will short out your keyboard!  Got it?  Ok.........good.
 

Really?  Are there even words for how amazing this looks?
Happy Halloween!  What is left of it.  What did you dress up as this year?  I dressed up as myself again, it is always very scary for the children.....and adults.  I figure its effective, keep going with it!

So as most of you may have read, today is mine and my husbands 9th wedding anniversary.  Why you ask did I agree to being married on the MOST pagan holiday of all time?  It was the next date open for the mayor who we wanted to marry us because he was a preacher as well.  The clerk laughed, and said, "well I have next Thursday, but it's Halloween", before I could object my husband responded in typical male fashion, "AWESOME".  My wedding cake had Frankenstein and the Bride of Frankenstein on it.  I wish we had a photo, but I don't think we do.  My mother will never get over that fact I got married in BLACK.  *Charcoal gray suit mother*.  Regardless, it has been the most adventurous 12 years of my life with this man.  Oh the things we have done, been through and things we have experienced.  I could write a book, and for those who really know me, you can attest to this.  So this year, we decided no gifts.  We decided to do something for each other we love best.  My husband gave me a 2 hour pedicure, we are talking ped-egg, lotion, painted toenails, massage, the whole bit.  *no, he has no available brothers*  I in turn made him one of his favorite meals.  It was a double whammy, I could make it AND then blog it!  You should all know that when I blog something, I have generally made it 5,000 times.  I just never paid attention to what I put in it, so I have to make it and measure everything.  It still is strange for me, I feel like a total conformist when I measure things appropriately!  But, if it means you being able to make it, and experience it and LOVE IT...I will do ANYTHING! teehee

So, when I first got this idea, I had seen something similiar on HSN.  Advertising a set of baking dishes.  I thought about it, and decided the concept was amazing but their recipe, or combination was heinous and I needed to make it new.  I stole the method, but the recipe is mine.  It may seem labor intensive, but it isn't. It is just alot of "steps" and will be so worth it you will wonder how you ever lived without me in your life.

Lasagna Rollups with Alfredo

1 1/2 lbs of ground meat.

(beef, Italian sausage, turkey, chicken or a combo) I used 1 lb ground beef and 1/2 lb of turkey Italian sausage, if in casing remove)
1.  Brown and drain, set aside to cook while you move on to the next step

2 cups whole milk ricotta cheese
1/2 cup grated parmesan cheese
1 1/4  cup grated mozzarella
1 1/2 tsp salt
1 tbsp dried Italian seasoning
1 egg
2.  Combine all ingredients thoroughly.  Stir in drained and cooled ground meat

3.  Cook 15 lasagna noodles in oiled and salted water according to package directions.  Drain and run under cold water immediately lay out on sheet pan to prevent sticking.

(Red Sauce/Gravy)
1 can crushed tomatoes
2 tbsp olive oil
1-2 cloves of garlic finely minced
1/2 large onion also finely minced
1 tsp dried oregano
1 tbsp dried basil or 5-8 leaves torn into sauce
2 tbsp sugar
1 tsp salt
4.  Add olive oil, onion and garlic to saucepan, cook for 2-3 min stirring constantly until onions are cooked slightly, add in tomatoes, oregano, sugar, salt, and basil.  Cook on low until ready to top dish *if using fresh basil add at the very end of cooking*

Alfredo Sauce (the nontraditional way)
2 tbsp butter
2 tbsp flour
2 cups milk/cream/half and half
1/2 cup grated parmesan cheese
1 tsp salt
5.  Melt butter and add flour, let cook for 2 min and whisk in milk, salt and parmesan cheese.  Stir constantly until thickened.  Set aside.


Now you have all the components made, a red sauce, a cheese/meat mixture,  alfredo sauce and the cooked pasta.


Pour alfredo into the bottom of a 9x13 pan.  Take a piece of pasta, spread the cheese mixture on it, starting at one end, roll it up, stick a toothpick in it to hold it and stand it on end in the alfredo sauce.
Spread filling on and roll up!  You can lay them on their side or stand them on end in the pan!

Repeat with all noodles.  When you have your pan full, pour red sauce over all roll ups, making sure each top is covered well, use ALL sauce.  Top with remaining mozzarella and parmasen cheese.  Bake in a 375 oven for 20-30 minutes.  Remove when you see cheese is beginning to brown.  

Before baking!


You will love these!!  Do not let the recipe scare you, you all know I am terrible at writing recipes, so I wrote this one in the order you can make it, it seemed easier.  I served some great crostini and a salad.


A few more hours of Halloween left!  Go watch a scary movie after you put the kids to bed,  Make sure to lock your doors............!!!!

Your "Halloween Wedding" chefwannabe
Chris