Showing posts with label ricotta. Show all posts

Saturday, January 24, 2015

500th Post!!! Italian Ricotta Cheesecake

Good morning ladies and gents!  Another dessert!  WOOHOO!  Seriously, this is getting a BIT out of control.  I mean, these may not go live back to back but I have literally made 4 desserts in less than a week.  It just happened that way.  Good thing I have lots of family to share with! 


Before I get started, take a look at the piece I cut out and the place I cut it from.  Seriously?  I can't even cut a proper triangle?  Very sad.  BUT interesting, right? HA!

Oh and one more TINY thing.  This is officially my 500th post!  What does this mean to me?  It means 500 times I have sat down at my computer to share food, fun, love, and memories.  I have made loving fun of nearly everyone in my family, and I have been able to share it with you, my Chefwannabe family, the extension of my real family.  Thank you for every bit of support, every ounce of advice, every teaspoon of criticism, even ever single gulp of pride.  I love you all, I respect you all, and you are pure joy in my life.  How many people get to be so blessed?  I count myself as one of those who are!  Crazy love to you every single one of you!

This ricotta cheesecake has been so long coming.  I have eaten it several times, back in the land of my Italian family and friends!  HOLLA South Jersey!  I have just tried to make it myself.  You will see it is so easy to make.  I mean, I used to be all intimidated by cheesecake.  Shhyeeaaahh, not anymore.  I had no recipe for this cheesecake.  In fact, I picked a part a few recipes I found and ended up ditching half the ingredients I came across.  I decided to fly with it, go with my gut on this one and it worked.  I mean, come on food bloggers and home cooks alike, how many times do you "get it" on the first try?  Exactly!.  And  then I decided to take the "no water bath" part from the Cake Boss and see if it really worked.  I figured if it cracks, and tastes like crap I learned two lessons in one day! 

Now, for anyone has never had a ricotta cheesecake.  Do not expect the texture of a regular cheesecake.  It is the same slight sweet flavor, I omitted the lemon, (ugh with the lemons already) and probably left out the most vital Italian ingredients.  But this turned out awesome and I had to share it with you.  The consistency is a bit grainy, maybe not grainy, hmm...what is it.  It has texture, where regular cheesecake it just smooth.  This is much lighter than a New York cheesecake so if you don't like the dense cheesecake this might be for you.  If you don't like light cheesecakes this may STILL be for you! 

Give it a try, and if you feel so inclined, add the lemon zest, but you aren't going to find it in my recipe!

Now, go, make this!

32 oz. whole milk ricotta cheese
4 eggs, separated whites and yolks
2 T. heavy cream
2 cups cup granulated sugar
1 T. vanilla extract

Preheat your oven to 450 degrees F.  In your stand mixer or with a hand mixer, beat egg whites to a medium peak.  If they go a bit further, no biggie, just get them to at least medium peaks and set aside. 


This part I do in the food processor, but you can easily just do it with a bowl and a spoon.  In a large bowl or the food processor, add in ricotta cheese, egg yolks, heavy cream, sugar and vanilla.  Mix until combined, or process until smooth and combined. 

 
Transfer to a large bowl if you need to.  Carefully, fold the egg whites into the ricotta cheese filling, in 3 editions.  You don't want to lose all of that beautiful fluff!  When it is completely combined, butter a 9 inch spring for pan WELL.  Bottom and sides.  Pour the cheesecake mixture into the spring form pan, and then give it a slight tap or two on the counter to get out any air bubbles.
 
 
Now place into the oven and IMMEDIATELY turn your oven down to 350.  Let back 55 minutes. and then shut the oven off.  DO NOT, I repeat DO NOT open the door and it shouldn't crack!  No need for the pain in the rear water bath!  When the 55 minutes is up, slightly crack the oven door, and shut off the oven, let the cheesecake sit in the oven until it comes to room temperature.  Chill for at least 2 hours.  I chilled mine overnight. 

Look Ma, no cracks!
Run a knife around the edges, and remove the sides of your spring form pan.  I heavy hand the powdered sugar on top, because, well, I like too!

Enjoy this delicious and unique dessert that will make you look like a rock star!


Wednesday, September 24, 2014

Baked Ricotta Pasta

Are you a fan of the ricotta?  I find it much like cilantro, you either are, or you are not, few are in between.  I am, however, the exception.  Sometimes I love it, something I don't, just depends on the dish I suppose.

I needed a quick side dish the other night.  I had a few leftovers from manicotti in my fridge and went to work in my science lab.  Actually, let's be honest, it is more like a sofa and a notebook but, none the less I came up with this pasta dish that my husband thought rocked, and I thought was pretty darn tasty too.  It is easy and quick, definitely a recipe to have in your arsenal of "OMG, they will be here for dinner WHEN?" recipes. 


Like that old retro casserole?  Rocks my world.

Anyway, you will need:

8 oz. short cut pasta
1 cup ricotta cheese
1/2 cup grated Parmesan cheese
4 T. butter
1/2 tsp. salt
1/2 tsp. black pepper
2 egg yolks

Preheat your oven to 350 degrees F.  While that is happening, cook your pasta in well salted water according to package directions.  Cook it on the low end of the recommended time.  When it is done, drain, and put back in the pot.  Add in all of your other ingredients.  Let butter melt, and mix gently until smooth.  Pour into a casserole dish and top with some breadcrumbs if you like!  Bake for 20 minutes.  This should serve 4 adults, easily.  I LOVE having a new side dish!  I hope you do as well!

ENJOY!


Friday, April 18, 2014

Mini Cannoli Bites

It may or may not shock you to know I am not the biggest fan of the cannoli.  Not the traditional way anyway.  I am not a huge ricotta fan and sweetening it, doesn't feel any better to my taste buds!  HOWEVER, my husband IS and I wanted to make a little cheater version, simply because making homemade shells just wasn't in my days plan.  I think these turned out really good AND furthermore, I think they would be perfect for a party!  You have the sweet cream right inside an edible bowl.  Perfection.  No dirty dishes for this girl!


Now don't ask why because I can't explain but I would NOT use a mixer, hand held or a stand mixer to mix the ricotta cheese.  I don't know why, but when you just use a spoon, it doesn't become as thin.  We don't want cannoli sauce here.  When you use a mixer it changes things.  So please, just use a spoon or else, I can't guarantee you will be happy with the outcome.  Although even if it is a bit thin you ARE putting it into a pie crust bowl!  Right?

Enjoy these and make sure to only fill as many as you will need, and don't fill until just before serving! 

15 ounces ricotta cheese
3/4 cup powdered sugar
1 tsp. vanilla
mini chocolate chips

Combine all ingredients until smooth, refrigerate until ready to serve.

Pie Crust (I used premade or you can find my fab pie crust recipe here.
1/4 cup sugar
1 tbsp. cinnamon

Combine sugar and cinnamon until mixed and set aside.  Remove your pie crust and roll out.  Using a small glass or cookie cutter, cut out circles that are big enough to set down into mini muffin cups!  I would say a 2-3 inch in diameter cutter or glass will work.  One pie crust yielded 24 mini cups for me, so you will need 2 pie crusts to make an entire batch.  If you only want 24, half the ricotta mixture recipe. 

Preheat your oven to 425 F.  Spray your mini muffin tins with nonstick spray.  Taking your cinnamon sugar mixture, sprinkle your pie crust circles liberally and then take your circle push it down into one of your mini muffin cups careful not to stretch it a lot.  Just put it in and push it down, so you form a cup. Repeat with all of your circles.  Bake for 10 minutes and then let sit until cooled.  Remove cups carefully and fill with your ricotta cream using a spoon or pastry bag and sprinkle the top with mini chocolate chips.

These should not be filled until just before they are ready to be served!  If you fill your pastry bag it will make much quicker work of it and you can keep it cool before filling.  Just my 2 cents!

If you love cannoli, you will love these little bites of pure bliss!!


Wednesday, July 17, 2013

Homemade Ricotta Cheese

Good evening friends!  Hoping this finds you all doing well and enjoying your evening!!


This cheese making thing, is getting a little out of control.  First hubs and I made mozzarella cheese, we have made it several times.  He has been on me about making ricotta cheese forever.  He LOVES ricotta cheese.  Not my favorite, but I get that he enjoys it.... immensely. 

I wish I had 1.00 for every single time I put him off about this.  I used every excuse in the book, from "it will be to hard" to "why can't we just buy it in the store" to "NO, I am NOT making ricotta".  Well finally he was done taking no for an answer.  I mean, he is a HUSBAND, shouldn't he be able to take NO for an answer? :)  Anyway, I gave in.  We looked up all kinds of recipes and techniques.  I can't believe the variance from super easy recipes to super involved recipes.  We ended up going with a recipe from epicurious.com for our first ever ricotta cheese making adventure.  It was easy, took no special equipment, other than needing to pick up some cheesecloth we were ready to go.

I will tell you in advance, this cheese was SO incredibly delicious, I will likely never buy it in the store again.  Not only was it delicious, but I knew exactly all 4 things that went in it!  How can you argue with that?!?

You will need:
1 large pot
cheesecloth
colander
1 1/2 tsp salt
1 gallon whole milk
2 cups heavy cream
6 tbsp. fresh squeezed lemon juice.  (do NOT use the stuff in a bottle)

Place cheese cloth into the colander and set in the sink.  Make sure you cut the cheese cloth bigger than you need so it stays put and cover the entire colander

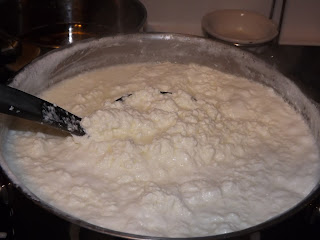
In a large pot, add in milk, cream, and salt.  Bring slowly to a rolling boil.  This might take a bit!  Be patient. 

When it is at a rolling boil, add in the lemon juice and turn off the burner.  Let it sit for approx. 2-3 minutes.  You will see it curdling immediately.


When you think it is curdled as it should be, pour into cheese cloth lined colander and let drain. 


The longer you let it sit and drain the dryer your ricotta will be. 

This yields 1 qt of ricotta.  (at least it did for us).  Refrigerate at least 4-6 hours.  Let it cool completely and then use however you choose.  Use it savory, use it sweet, the options are endless.  This is the best thing goin' and I can't WAIT to make it again and again!  Funny how things change, eh?

Your "admittedly likes making ricotta" Chefwannabe


Monday, April 1, 2013

Chicken and 3 Cheese Manicotti

I think SPRING is finally here!  I mean as it stands the snow is nearly ALL gone, and our pattern here in Nebraska, is when it is gone, it is time for more.  Please, mother nature I beg you, NO MORE SNOW!  Hoping you had a wonderful Easter and the Easter Bunny was good to you! 


I am on a use up streak.  How do all these things get pushed to the back, the corners, the bottom of the fridge, cupboards and pantry, freezer??  I keep thinking how spoiled and blessed we are to be able to buy food, we forget we bought.  So this recipe was born out of using up what I have on hand, and it sure stretches a buck, using 1 lb of ground chicken to feed 4-5 people.  Before you ask....Yes, you can use ground pork or ground beef.  I prefer chicken, and always try to use ground chicken breast when I can.  I only buy it when it is on sale or in the "used meat" section.  HA.  That is what my dad always called marked down meat when we were kids.  It stuck I guess. I figure if I am going to go home and use it the same day or the next day or pop it in the freezer, it is fine, and I am taking advantage of the mark downs.  I urge you to do the same.   I also find ground chicken breast a healthier option although with all this cheese, I am not sure it matters!!  Yes it does, it is real food, made at home, and that alone makes it 10 steps ahead of anything store bought!

On the cheese, use what you like.  I did use whole ricotta but change it to skim if you like.  I had bought ricotta for something else that didn't pan out, so to speak.  The grated cheeses, the same, if you want to change it up or you only have Colby or muenster or parm, use it!  This as always is my recipe, my method, when you choose to make it, it is your recipe, just use my method, because you know it is the best. (ok stop laughing), anything is possible once it gets into your hands, so be creative or make it word for word, either way you won't be disappointed!

Chicken and 3 Cheese Manicotti
1lb ground chicken
1 tsp Italian seasoning
1 tsp garlic powder
Salt and Pepper
3/4 cup grated cheddar cheese
2-3 cups grated mozzarella cheese, divided
1 1/2 cups ricotta cheese
1 egg
2-3 cups crushed tomatoes or your favorite marinara
1 box Manicotti Shells (14 shells)

Preheat your oven to 350 degrees.  In a skillet, place ground chicken, Italian seasoning, garlic powder, and salt and pepper to taste.  Brown until chicken is completely cooked through.  Set it aside and let it cool. 

While that is happening, bring a large pot of water to a rapid boil, add in plenty of salt to the water and a drizzle of oil.  Place shells in and cook according to package directions.  When they are done, slowly pour out the hot water while running cold water into the pot.  When they are cool enough to handle, completely drain, set aside.

In a large bowl mix chicken, all cheeses (1 cup of mozzarella here) and egg together.  Mix until completely combined. 


Using a small spoon or piping bag with no rip, fill the shells.  There should be exactly enough filling and you can be generous with it in each shell!  Fill and place into a pan sprayed with nonstick cooking spray.  Line them up however you need to, in order to get them to fit.  I actually used a small pan and a large pan as I was making it for 2 separate meals. 

When you have them all lined up, pour over half of your crushed tomatoes or marinara.  I like to pour it down the center, and spread it a bit, leaving the ends uncovered because it looks prettier!  (you will notice I went further than just the center this time!) Do it however you want.  Now sprinkle your remaining mozzarella cheese over the top, then add the rest of your tomato product on top. 


Bake for 30-40 minutes, until bubbly and hot all the way through!

Make sure to serve this with a good hunk a' crusty bread!!

Your "maniGOT = manicotti" Chefwannabe

Monday, January 30, 2012

Hoss's Famous Lasagna


Oh what an experience this was.  I turned into his um, kitchen workhorse.  He had never measured out his ingredients before so I was writing and the man who HATES to have his photo taken, suddenly went into supermodel mode and wanted to pose for pictures of every step.  I would have been annoyed at his demands had I not been laughing so hard pretending to have to take second and third photos just to get him to stand in his "pose" a little longer.  Since this will be a blog, full of photos, let me get started on the instructions.


This recipe is HUGE.  We make an aluminum turkey roaster pan and a 9x13 pan.  We like lots of leftovers since we only make this once or twice a year.  When you marvel in awe or disgust at the ingredients, remember this is a ONCE in awhile treat, nothing we eat regularly, so no comments, you got it?


(DISCLAIMER: This is my husbands recipe and he had it long before me, so I am not touching it!)

I will list the ingredients you need in a list.  The ingredients will most likely need to be divided among the different parts of the lasagna.   This is just a master list.....and boy is it a master list alright!

Meet my husband George, aka Hoss or (Geo)

3lbs ground beef
1.5 lbs mild/hot Italian sausage
3 jars spaghetti sauce of your choice
1 can whole tomatoes (use your clean hand to smoosh)
1 box Pomi strained tomatoes *or any crushed tomatoes*
6 eggs
3 lbs ricotta cheese
4.5 lbs shredded mozzarella
3/4 grated Parmesan
2 boxes of dried lasagna noodles (I recommend NOT using the "no boil")
Dried - Italian Seasoning, Basil, Oregano
1/2 cup sugar

Boil noodles.  Drizzle them with oil and lay out in a single layer, cover with foil and lay more on top, etc.  Preheat oven to 350 degrees.


To make bolognese:
In a large pot, empty your jars of sauce.  Add a little bit of water to each jar and swirl around to get all of the sauce out and thin your sauce.  Add in 1/2 cup sugar, 1/3 cup dried Italian seasoning, 1 tbsp garlic salt, 1 tbsp basil, 1 tbsp oregano and pepper to taste.  You can add red pepper flakes to taste if you like.  While it simmers...

Brown ground beef and Italian sausage in large skillet. Season it with...
1/4 cup dried Italian Seasoning
2 tbsp garlic salt


Make sure to break it into very small bits.  You don't want large chunks of meat in your sauce.  Well YOU might but not mine!


Drain ground meat but DO NOT RINSE, you will rinse off all of the flavorings!! Pour into your already simmering sauce.


Your spoon should stand up in it, that is when you know it is perfect!
Simmer sauce for as long as you can on a medium low temperate. Be sure to stir often as the sugar will burn on  the bottom.  Try to let simmer up to 2 hours.  This sauce simmered for 2 hours.

Showing off his um....2 handed egg whisking skills.
Cheese Layer:
3lbs ricotta
6 eggs
1 cup shredded mozzarella
1/4 grated Parmesan cheese
1 tbsp salt
2 tbsp dried parsley

Combine until creamy and everything is mixed completely


Sauce
Add a ladle full of sauce to the bottom of both pans.  This keeps the pasta  from sticking.  Then layer as follows:

Noodles

Sauce
noodles 
mozz cheese
sauce
noodles
ricotta mixture
mozz cheese
sauce                                                                                   
noodles
mozz cheese
grated parm

This is just my suggestion, you can layer it however you choose to.

Put larger pan on a cookie sheet for stability.  The large one will take 1hr-1.5 hrs in the oven. Keep covered until the last 20 minutes.  The small one will take 30-45 minutes, keep covered until the last 15 minutes.  After removing from the oven, let sit 10-15 minutes before cutting!

Sauce
Only missing its top layer of cheese!
Here he is in his sprinkling glory.  We had a great afternoon cooking.  Nothing can replace simple time together, laughing, singing, and laughing some more!  Thank you honey for making lasagna for my blog.  You are my best friend and my coolest buddy ever!

Happy guy eh?
This is not cheap to make but when  you consider the amount of food you get, it really works out.  You can also make 3- 9x13's. Great from the freezer!  Let thaw in the fridge overnight and pop in the oven for dinner!  We just served it with the usual suspects, salad and crusty bread!

I hope you enjoyed the photo shoot my husband roped me into.  Disguising it as a lasagna blog was clever.........he totally has an inner supermodel!!  I adore this guy...xoxo

Your "wife of a lasagna making supermodel" chefwannabe
Chris