Wednesday, September 11, 2024
Easy No Bake Cheesecake
Sunday, September 25, 2022
CheeseCake Fluff Dessert
YOU GUYS! I uploaded this video and forgot to post the recipe! There will be no awesome blog post, just that I can get this kind of "dessert" at a local grocery store and decided I had to try and make it at home! I did! I did! I did! Try it if you love cheesecake, especially light, creamy cheesecake!
FILLING:
- 2 sm. boxes CHEESECAKE flavored pudding
- 3 cups heavy cream
- 1, 8oz container of whipped topping
- 1 sleeve (10-12 crackers) graham crackers
- 2 TBSP white granulated sugar
- 1 cup melted butter
For the filling, add in pudding and heavy cream. Beat for 3-4 minutes, incorporating as much air as possible into the mixture to make it light and fluffy. Add in 1/2 of your whipped topping and beat it in to lighten the mixture. Next, take a spatula and FOLD in the rest of the mixture. When it is completely mixed, add the filling into the crust using a pipping bag or a spoon. If piping it in, you don't need a tip, or you can use a Ziploc bag, but this step will make it extra light and fluffy, I promise! When done, sprinkle with the extra graham cracker crumbs and chill for 1 hour. Oh, NELLY this is awesome!
ENJOY!
Thursday, November 30, 2017
Blueberry Cheesecake Cookies
I am glad to be back with you, after all, it IS the most wonderful time of the year! Right? I am ready for holiday cheer, holiday feelings, holiday food, and everything else! I truly find it odd, how busy things have been yet, at the beginning of such a busy time, I get to make time to share some cookies with you!
If you have been following me awhile you know I have a "Just Say NO To Brown Cookie Trays" campaign. Well, maybe not a campaign but, I feel strongly about it. You know the ones, don't act like you have never received them! Hard cookies, difficult to differentiate one "flavor" from another, and not even sure what is in them. Yes, those cookie trays. I actually came up with these cookies, because I sell Scentsy as well. This Blueberry Cheesecake Scent Bar came out and I was like, "oh maaaaan, I need to make that edible"! I did! This recipe was adapted from Get In My Belly.
This recipe makes between 18-24 cookies. I will without a doubt double it when I make it again. This will be on my cookie trays, and I hope they will be on yours! My grandson helped me with these today, and he also is in the YouTube video that will accompany it!
Here is what you will need:
1/4 cup softened cream cheese
1/2 cup butter
1 cup sugar
1 egg
1 tsp vanilla extract
1 1/4 cups all purpose flower
1 tsp baking soda
2 tsp cornstarch
pinch of salt
frozen or fresh blueberries
Optional:
white chocolate
vegetable oil
Preheat your oven to 350 degrees F. Using a stand or hand mixer, combine cream cheese and butter. When it is combined add in sugar and again, mix until all ingredients are combined. Add egg, vanilla flour, baking soda, and cornstarch. Mix until ingredients are just combined.
Refrigerate your dough for 1 hr. I did 30 minutes and it worked fine but if you double the batch, go for 1 hr. You can chill it up to overnight if you like.
Place balls of dough or use a cookie scoop. Bake for 10 minutes. Dough will spread, but if for some reason yours does not, just give it a little smoosh with your hand. I used frozen blueberries I had let sit out for 10 minutes, but fresh will be awesome as well! Place 4 or 5 blueberries on the top of each cookie, slightly pressing them in. Let sit for 15 minutes.
You can enjoy as is, or you can drizzle with some melted white chocolate. Use about 1/2 cup of white chocolate chips, melt in 30 second increments in the microwave. Add a cap full of vegetable oil to it to make it a bit more liquid and drizzle-able! Drizzle and let the chocolate set before serving!
I hope you enjoy these little heavenly cookies! I think using strawberries, raspberries, etc would be awesome as well!!
ENJOY!
Wednesday, January 4, 2017
Blueberry Cheesecake Stuffed French Toast
Instagram: @ftchefwannabe
Facebook: www.facebook.com/foodthoughtsofachefwannabe
Twitter: FTofChefwannabe
YouTube: https://www.youtube.com/user/cecsmith/about
Pinterest:https://www.pinterest.com/ftoacw/
My new YouTube channel is much adieu about life, and some cooking videos. I will get more into the cooking video aspect as soon as I get some equipment that makes it easier! I would love to have you on any or all and make sure to visit, subscribe, follow, join, and comment!
Ok, just haven't put all that info in a post lately so now, about this Blueberry Cheesecake Stuffed French Toast! YES! It IS awesome!
Hubby had made a request, and much to my surprise, what I made was completely different than what he was requesting but we both decided it was so good, (as did my daughter in law) that I wanted to share it with you. This would be an awesome breakfast, brunch or even dessert dish! It is easy and can be baked, refrigerated and eaten cold or reheated!
Here is what you will need!
12 (ish) slices of Texas Toast (the fresh stuff, no garlic toast, no frozen, fresh, or you can use a loaf of bread you slice very thick.
For the FILLING you will need:
12 oz. cream cheese
1 cup powdered sugar
1 tsp vanilla extract
1 1/2 cups fresh blueberries
Custard:
5 eggs
2 cups milk
3/4 cup sugar
1 tsp vanilla extract
Preheat your oven to 350 degrees F. Butter or grease a 9x13 baking pan. Take a knife and make a slit in the side of your bread about halfway through. It is easier if your bread is cold or even frozen! Do this to all of your slices. Put aside and prepare the cheesecake filling.
Add on FILLING ingredients together and with a hand mixer, mix until combined. You can leave out a few of the blueberries to fold in whole, or just add them all in the mixture. Divide between all the slices of bread and fill up the pocket you created.
Now prepare the CUSTARD. Again, combine all ingredients and beat until combined, and frothy. Pour over your pan of stuffed french toast evenly. It won't come above the bread probably. No worries, just pour over and it will be fine!
Let sit just a couple of minutes and bake for 35-45 minutes. Let cook for 10 minutes!
I sprinkled mine with some powdered sugar and served! You get a cheesecakey side and a bread pudding side and the tops are a little crisp like french toast. (DROOL)
ENJOY!
Saturday, January 24, 2015
500th Post!!! Italian Ricotta Cheesecake
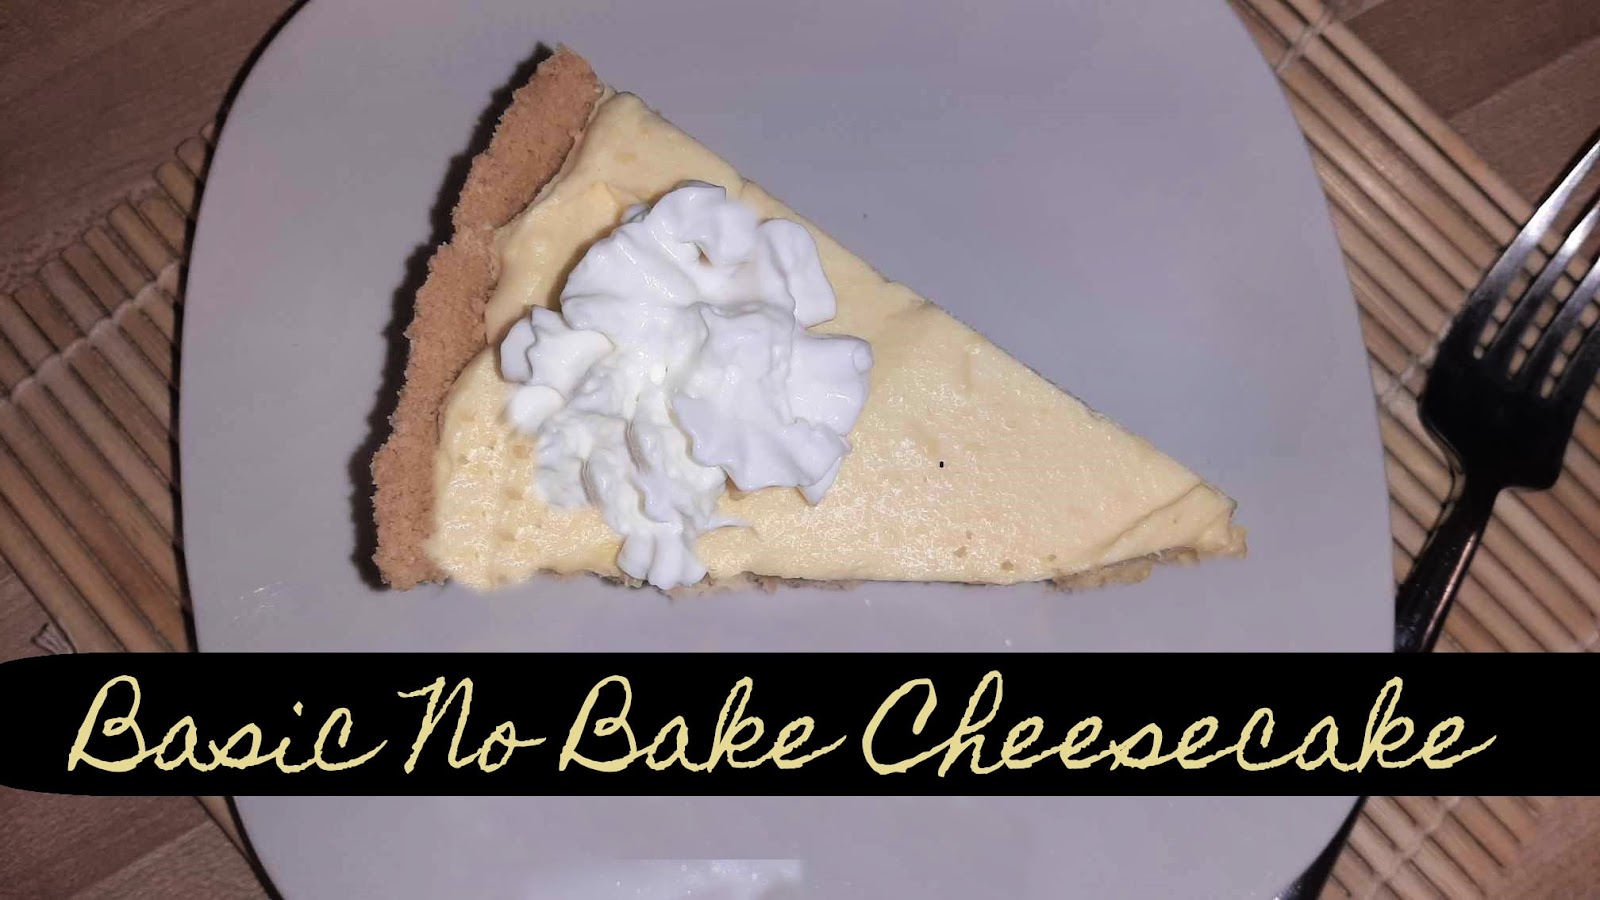
Before I get started, take a look at the piece I cut out and the place I cut it from. Seriously? I can't even cut a proper triangle? Very sad. BUT interesting, right? HA!
Oh and one more TINY thing. This is officially my 500th post! What does this mean to me? It means 500 times I have sat down at my computer to share food, fun, love, and memories. I have made loving fun of nearly everyone in my family, and I have been able to share it with you, my Chefwannabe family, the extension of my real family. Thank you for every bit of support, every ounce of advice, every teaspoon of criticism, even ever single gulp of pride. I love you all, I respect you all, and you are pure joy in my life. How many people get to be so blessed? I count myself as one of those who are! Crazy love to you every single one of you!
This ricotta cheesecake has been so long coming. I have eaten it several times, back in the land of my Italian family and friends! HOLLA South Jersey! I have just tried to make it myself. You will see it is so easy to make. I mean, I used to be all intimidated by cheesecake. Shhyeeaaahh, not anymore. I had no recipe for this cheesecake. In fact, I picked a part a few recipes I found and ended up ditching half the ingredients I came across. I decided to fly with it, go with my gut on this one and it worked. I mean, come on food bloggers and home cooks alike, how many times do you "get it" on the first try? Exactly!. And then I decided to take the "no water bath" part from the Cake Boss and see if it really worked. I figured if it cracks, and tastes like crap I learned two lessons in one day!
Now, for anyone has never had a ricotta cheesecake. Do not expect the texture of a regular cheesecake. It is the same slight sweet flavor, I omitted the lemon, (ugh with the lemons already) and probably left out the most vital Italian ingredients. But this turned out awesome and I had to share it with you. The consistency is a bit grainy, maybe not grainy, hmm...what is it. It has texture, where regular cheesecake it just smooth. This is much lighter than a New York cheesecake so if you don't like the dense cheesecake this might be for you. If you don't like light cheesecakes this may STILL be for you!
Give it a try, and if you feel so inclined, add the lemon zest, but you aren't going to find it in my recipe!
Now, go, make this!
32 oz. whole milk ricotta cheese
4 eggs, separated whites and yolks
2 T. heavy cream
2 cups cup granulated sugar
1 T. vanilla extract
Preheat your oven to 450 degrees F. In your stand mixer or with a hand mixer, beat egg whites to a medium peak. If they go a bit further, no biggie, just get them to at least medium peaks and set aside.
This part I do in the food processor, but you can easily just do it with a bowl and a spoon. In a large bowl or the food processor, add in ricotta cheese, egg yolks, heavy cream, sugar and vanilla. Mix until combined, or process until smooth and combined.
Look Ma, no cracks! |
Enjoy this delicious and unique dessert that will make you look like a rock star!
Monday, November 3, 2014
Pumpkin Praline Cheesecake Bars
It is time to start thinking about and planning our Thanksgiving menus! While I love changing a few things up every year, there are definitely dishes that are tradition that are NOT to be messed with. Is it like that for you all as well? If I ever omitted, baked mac and cheese, or coleslaw from a holiday meal, I would be disowned! This year I am definitely looking forward to Thanksgiving, since our kids have moved here now! We get to have a real holiday together! WOOHOO! I haven't been able to spend a Thanksgiving with my son for about 6 years. We are just thrilled!
With all that said, I have a pumpkin loving family. I wanted something other than a plain pumpkin cheesecake, (however, they are one of my fav's). I just decided to experiment and when it turned out, I had to test it a second time, I wasn't sure how it turned out this good, but, when I tried it for the 3rd time and my daughter in law informed me, "This is BOMB", I knew it was share worthy! The texture is crazy awesome and the flavor, well, I mean come on, "pumpkin praline cheesecake". Pffttt, delish. I think it will be part of our Thanksgiving dessert table this year. I hope you make it part of yours too!
OH! I almost forgot. The pan you will need... I used about an 7x10 or something close to that. A 9x13 will be to big, unless you double your cheesecake layer recipe. A 9x9 should work nicely. WHY did I use such an odd size? I don't know either, but I did. So just keep that in mind when picking what size to use!
1 yellow cake mix
3/4 cup melted butter
3/4 cup pumpkin puree
8 oz. cream cheese (softened to room temperature)
2 eggs
3/4 cup brown sugar
1 tsp. vanilla extract
1 cup pecans
2 T-1/4 cup maple flavored pancake syrup or maple syrup
Preheat your oven to 350 degrees F. In a bowl combine dry cake mix and melted butter.
Combine, pumpkin puree, cream cheese, eggs, brown sugar, and vanilla extract until smooth and creamy. Pour over crust. Top with pecans, and then drizzle over your syrup. Bake for 35-40 minutes, until almost set in the middle. It will jiggle a wee bit. Remove and let sit until it is room temperature. Now chill for at LEAST 6 hours. I think it is best chilled overnight. Serve with a some sweetened whipped cream, or a small scoop of ice cream even!
MMMM-mmmm good!!
Wednesday, June 25, 2014
Cheesecake Bread
It has certainly been a busy summer around here! For those who don't know, my son, daughter in law and twin littles (grandbabies) moved here in May, which explains my periods of absence. I am so busy watching them grow, playing, snuggling, and enjoying them and the kids, I can't seem to find a balance. However, I am missing my website and friends, I will figure this out, I am new to this "having my littles near me" thing. It put me in full on Nonna mode!! Here is who has been blessing my life!
Gorgeous, aren't they?
Let's get to this delicious cheesecake bread that was inspired by a recipe my daughter in law used to make at a pizza shop she worked at!
For the dough you will need:
3 1/4-1/2 cups all purpose flour
1 tsp salt
3 tsp sugar
2 tsp vanilla extract
1 1/4 cup warm water (approx. 105 degrees F)
1 packet of yeast
Add yeast to your warm water. Remember if the water is to hot it will kill the yeast and if not hot enough, it will not activate the yeast! You can do this! Just sprinkle the yeast on top and let it sit for 3-5 minutes until it becomes foamy or scummy on top. While that is happening combine your flour, salt, sugar and vanilla. Add yeast mixture when it is ready. Using a dough hook on your stand mixer let it "knead" for 5 minutes. Yes, 5 minutes. If you don't have a stand mixer, knead until the dough is smooth and gorgeous! Oil, butter or spray a large bowl with nonstick cooking spray, put your ball of dough in it, and cover. Let sit in a warm place with no breezes until it has doubled or nearly doubled in size.
For the filling and finishing you will need:
1 small plain cheesecake (I purchased mine)
1/2 cup of cinnamon and sugar mixture. (1/2 cup granulated sugar, with 2-3 tsp of cinnamon)
1 egg with 1 tbsp. water for egg wash
1/4 cup butter (melted)
When the dough has risen, divide it into 4 small sections. (you can also do one, large one with the entire dough ball but you know how I feel about mini anything!) Roll dough out into a rectangle or circle, it really doesn't matter. Divide your cheesecake pieces up if doing mini loaves. I had enough to do 3 slices of cheesecake for each of my 4 individuals. Use them all for one large one, obviously.
Crumble the cheesecake up on top of the dough, sprinkle liberally with the cinnamon sugar mix and seal it up, however you want! I fold in both sides then tuck the ends and flip it over!
Now brush the top with your egg wash, make two slits on the top with a knife and bake at 425 for 15-30 minutes depending on the size. When the top is golden and hard, it will be done! Immediately brush with melted butter and sprinkle on more cinnamon sugar mixture on top!
Serve these warm, OR.......put them in the freezer and serve at room temp when you need them! Allow a couple of hours to thaw. DELICIOUS!
ENJOY!
Wednesday, November 6, 2013
Creme Brulee Cheesecake
I am so picky about my cheesecake. There are two things my cheesecake must have. First is, it must be creamy, not dry, not so dense you will choke on it going down, and second, the perfect crust to cheesecake ratio. Seriously, I am so hell bent on those things, I rarely find a cheesecake I love. UNLESS, I make it myself.
See that the cheesecake isn't so tall? That is because it would completely jack up my ratio. To much cheesecake for the crust. Can't have it. The Nilla wafers for the crust, just drive the beautiful vanilla flavor home. I could not be happier with how this baby turned out. I don't care for lemon juice in my cheesecake. I used sour cream, for the tang, but the creaminess too. Just get in your kitchen, and make it. I am making myself drool just explaining it, and there is none left. That is right, NONE left. I hope you enjoy the sweet, tangy, creaminess, along with the crunch of the top. OMG, just those words ALONE get me excited! I seriously just thought that the only way to make cheesecake better was to finish the top like crème brulee and to taste like cream brulee. Mission accomplished on both.
For the crust you will need:
40 Nilla Wafers
5 tbsp melted butter
In your food processor or with a rolling pin, process or roll over the cookies (in a Ziploc)) until you have fine crumbs. Add in melted butter and process until combined or mash your bag until all the butter is incorporated into the cookies. Press into the bottom of a LIGHTLY greased 9 inch spring form pan. Set aside.
For the filling you will need:
2 8oz bricks of cream cheese (at room temperature)
2 eggs
1 cup brown sugar
2 tsp vanilla
1/2 cup sour cream
Using a large bowl and a hand mixer, or your stand mixer OR food processor, combine all ingredients very well. Pour into pan with crust and even out. Now take a large sheet of foil, and lay it flat on the counter. Put your pan in the center and fold the foil up all around the pan. This will prevent any water from your water bath seeping into the pie.
Now place the spring form pan into a larger backing sheet or roaster. Fill the roaster halfway up with boiling water. DO NOT get water into your pie! Bake for 1 hour at 350 degrees. Remove pie, the middle will be a TINY bit jiggly. Let cool at room temperature COMPLETELY. This is NOT optional. Then refrigerate for 4-5 hours, but overnight is best. The longer the better.
Garnish:
1/4 - 1/2 cup brown sugar
Sprinkle over the top in layers. Using a torch or the broil setting on your oven, melt sugar. I left a bit of it unmelted which made for a beautiful little crunch. If you broil it, do NOT leave it for even a second. When it started to bubble or browns to your liking, remove and let cool.
I hope you give this pie a try. We LOVED it and let's be honest, what's not to love?!
Monday, June 10, 2013
Pineapple Cheesecake Popsicles!
My typical summer as a kid, was getting up early, going to the "little" baseball field 2 blocks away and playing morning league baseball with every other kid in town. I would go home, play, have lunch, usually a trip or two through the sprinkler, help my mom in the garden or with canning, have lunch and then off to the swimming pool. We would swim from when the doors opened until they closed. Sometimes, my dad would give us a quarter to walk during one of the "breaks" to the Ord Drive In, to get an ice cream cone. Barefoot and carefree, with my ice cream, and living in my swimsuit. Now THAT was my idea of a great summer.
When I think of summer food, I think about burgers, sliced tomatoes, hot dogs, bologna sandwiches which thanks to a childhood full of bologna, I can no longer tolerate the sight or smell of! Mostly I remember my mom making popsicles. She had these Tupperware popsicle molds. Do you remember those? Sometimes we would use a plain ice cube tray and stick the "washed" popsicle sticks in. Yes, we did that, we would eat a store bought popsicle, which we didn't get very often actually and SAVE the sticks, they would get washed and had a place in the silverware drawer for making our own!! ACK! Sometimes we got those long frozen ones in the plastic. You know the ones, the ones that you eat and then with great determination try to suck the juice left at the bottom out of?! I loved green. I loved red too.
Well, since summer is so near, and since I have my fill of frozen kool aid popsicles, I wanted to make something fancier. Who can have to many popsicle variations? They are like cupcakes that way....NOT possible. You see variations of this recipe everywhere I am sure. But I want to share with you that BEST version, well, in my opinion anyway! You could trade this fruit choice out for anything but let me assure you, the combination of pineapple and cheesecake is one, you should NOT tamper with willingly. Ok let me reiterate, when I tell you these are AMAZING, I mean, like......the day they invented electricity, kind of amazing. Got it?
I bought these molds at Family Dollar. You can buy them nearly anywhere. Mine were 1.50 for the 4 popsicle molds. I bought 3. This recipe will make anywhere from 9-12 depending on the size of your molds and how full you fill them. Ready?
1 8oz. pkg Philadelphia cream cheese
1 can sweetened condensed milk (NOT evaporated)
1/2 cup crushed pineapple WITH juice. (don't drain!)
1/2 cup milk
Combine cream cheese and condensed milk until creamy. Add in milk and blend with your hand mixer until combined. Add in pineapple last so that you keep a few of the chunkier pieces.
Fill your popsicle molds not quite to the top. Put the tops on. If you are using wooden sticks, place foil over the molds and poke the sticks through the middle of each popsicle so that foil will hold them upright.
Freeze at LEAST 8 hours. Because these have cream cheese in them they won't freeze rock hard like a regular all liquid popsicle. They will be the consistency of say, a, pudding pop. Run the mold under warm water until it will lift out easily. This make take a few seconds, be patient! My husband kept pulling the sticks out when he would remove one, I never had the problem at all. Likely because I have patience. (just a guess).
These are creamy, rich, and refreshing all at the same time. Don't worry, I have more summer treats coming your way! ENJOY!!
Monday, November 19, 2012
Mini Caramel Cheesecakes
I especially love it on cheesecake. I asked you all on Facebook how you felt about cheesecake and what you liked to top it with. There are so many options aren't there?! Many of you like cherry pie filling, strawberries, caramel/turtle varieties and my husband and dads favorite, pineapple. I am usually a purist, I like it plain. I actually like it from Aramingo Diner in North Philly but we all know, I can't just hop in the car and go for a cheesecake run with my bestie anymore. (insert sad face). It just occurred to me, that they used to SHIP. Any of my Philadelphia peeps, do you know if they still do? Anyway, I have a recipe for Sopapilla Cheesecake here but this is just a little different. And it is a "mini", you all know how I feel about that.
Now, for this recipe, I used my caramelized sweetened condensed milk technique. I know there are many ways to do it, but I boil mine, it is what I have always done so that is the one I am recommending. Place your sweetened condensed milk (still in the unopened can) in a large pot of simmering water. NEVER let the water get lower than the can, it MUST stay covered with water. I cover with a lid and let simmer 3 hours. I check a few times to see if it needs water but as long as you keep it covered it should be fine.
Now shall we get to the makin' part? I think so too. This recipe will make 12 mini cheesecakes! I used Caramel Apple Candy Corn for the tops, use whatever you like!
For the CRUST you will need:
1 1/2 cups graham cracker crumbs.
2T melted butter
1/4 cup sugar
Mix together in a small bowl. Line your muffin tin with papers and divide crumbs among them. It comes to about 1 1/2 tbsp per cup. Give or take, just work it out, I have faith in you! Use a clean finger to press them down. You like how I say that? Like you might pick your nose just before hand or something.
Preheat your oven to 300 degrees.
For the FILLING you will need:
12 ounces cream cheese, room temp
3/4 cup sugar
1 tsp vanilla
2 eggs
Pinch of salt
I combine all of these in my food processor and saved myself the overworking of my fragile arms. HA! Use a hand mixer, stand mixer, food processor, or your arms to combine this until smooth and creamy! Divide among the 12 cups. They will be close to the top, but no worries on that, just git-r-done. Did I just say that? Bleh!
Bake for 30 minutes. You can check at about 25, but I am nearly positive our ovens aren't THAT different, they were perfect at 30 minutes for me.
They will have puffed up a bit. But as you let them cool, they will fall a bit. If a few are cracked, no biggie, we are going to cover it up anyway!
Let them cool for 20 minutes. Now you have to decide what you want to do. If you are going to transport them keep them in the pan.
Topping:
1 can of caramelized sweetened condensed milk. (poor milk has been through a lot)
12 pieces of your favorite little sweet treat for the top!
Top them with the caramelized condensed milk and then a colorful treat OR take the wrappers off, top them and plate them. Either way, they need refrigerated for at least 1 hour before serving, they are just best that way so don't try and talk yourself out of it.
I took them out of the papers because I liked being able to see the layers but feel free to leave them on too!
I hope you decide to put these on your holiday table, or your everyday table for that matter! Be careful, you might not be able to stop at just one!
PS. Unwomanly in fact, is NOT a word.
Tuesday, July 17, 2012
Polka Dots!! Cheesecake Brownies
These are so good, I even paid the carpet cleaner in brownies! Seriously, it seemed to work well! HA!
Without further adieu let's get to the recipe. These are so easy, and to be honest, they get even better the more chilled they are! I loved them a couple hours after I made them but after they were in the fridge overnight, they were *in my best opera voice* AMMAAZZZzZIINNNGG!
You will need:
Any brownie mix, prepared and baked
in a 9x13 pan
4 8oz. bricks of cream cheese, softened
4 eggs
1 cup white sugar
1/4 flour
1 tsp vanilla (or more, teehee)
Food coloring (optional)
pastry bag or Ziploc bag.
Prepare your brownies as directed. Bake them completely and let them sit while you prepare the cheesecake filling.
In a bowl mix cream cheese, eggs, sugar, flour and vanilla. Mix with a hand mixer until it is completely smooth and creamy. Easy, right?
Now, remove 1/2-3/4 cup of the batter and put it into a separate bowl. Add food color and mix completely. You can do more than one color. If you choose to use 2 or more colors, use 1/4-1/3 cup for each color. Put each color in either a pastry bag, or a Ziploc bag that you cut the tip off of.
Spread cheesecake batter over the brownies.
Take your colored batter and make "poka bots" all over the top! It is fun just TELLING you about it!
Let cool completely before you cut them. It makes a huge difference in my opinion. If you have time, cover and refrigerate.
I think these would be awesome for parties. You can coordinate the colors with party decorations, etc.
Please stop over and visit Tammy. She is funny, talented and so fun to watch! Thank you Tammy for letting me enjoy this recipe too!
Monday, April 16, 2012
Sopapilla Cheesecake
I did make ONE change. Remember how I didn't know I was out of sugar? Well, I had enough for the filling but not the top so I substituted brown sugar on top and holy brown sugar batman, I am never going to put white sugar on top!
Here is what you will need to pick up at the store, easy and cheap, just like..oh nvm.
2 8oz blocks of cream cheese
1 cup white sugar
1 tsp Vanilla Extract (homemade or store bought)
2 cans of crescent rolls
1/2 cup butter, softened
1 tsp cinnamon
3/4 cup sugar (brown or white, I used brown)
1/4 cup honey
Preheat your oven to 350 degrees. In a 9x13 baking dish, spray with nonstick cooking spray and roll your crescent rolls out to make a bottom crust. Spread out the dough and pinch seams together.
bottom crust |
Set aside and make filling. In a bowl combine cream cheese, white sugar and vanilla. Use a hand mixer to obtain the creamiest texture possible. Spread this out unto your bottom crescent roll crust.
Filling spread on! |
Take your second can of crescent rolls and roll out over the top, doing the same with pinching seems together and stretching it to fit. I kind of did it on the counter and then picked it up and put it on. Do the best you can, it won't be the end of the world if a seam shows, you can see a few on mine! Next, in a small bowl combine butter, brown (or white) sugar, and cinnamon. Mix thoroughly and dot the top of the dessert with teaspoons full.
They will all melt together so no worries, you will have plenty. Here is the hard part. You MUST let it cool COMPLETELY before slicing. I know it will be hard, maybe you can vacuum under your bed or clean a closet. You know. The one that you need to wear a helmet to open the door? By the time you are done, I swear it will be ready to dive into!!
Bake for 30 minutes. Keep an eye on it. It will seem a little jiggly when you take it out. It is the butter, don't worry.
drizzle honey!! |
I hope you take time to try this. It is so easy and requires things you probably already have around the house.
Do not delay, try this today!