Showing posts with label mini. Show all posts

Monday, September 9, 2013

Wedding Cake Bites

Yes, you TO can have wedding cake without having to get dressed up, get a wife, get a husband, pay for an open bar, or an expensive dress!


Everyone (OK most people I know) are wedding cake fanatics.  I asked you all on Facebook what flavor immediately came to your mind when I said, "wedding cake".  You had lots of cool responses for sure!  When I think of wedding cake I think of white cake, with almond flavor.  Pretty old school eh?  But for some reason that is what comes to me first.

I could have easily gotten these flavors with a cake mix.  But instead...........  I did it from SCRATCH!  Love that, dontcha?  I do bake from scratch, sometimes, so be nice!   I wanted the true wedding cake experience in one bite.  So tweaking some flavors, I think I accomplished what in MY mind is a bite of wedding cake heaven, WITHOUT having to buy a gift.  Just sayin'...

I made mini cupcakes, thus, ya know, the "bite" part.  You are welcome to make regular size cupcakes.   This recipe yields approx. 5-6 dozen mini cupcakes.

Wedding Cake:
2 cups flour
2 tsp baking soda
1/2 tsp salt
1/2 cup shortening
2 eggs
1 1/2 cups sugar
1/2 tsp almond extract
1 1/4 cup milk

Preheat your oven to 350 degrees F.  In a small bowl combine, flour, baking soda, and salt.  Set aside.  In a larger bowl or the bowl of your stand mixer combine, shortening, eggs, sugar, almond extract and milk.  Mix until completely combined.  Add in flour mixture and mix just until flour is incorporated.  Line a mini cupcake pan and fill 3/4 of the way full.  bake 13-15 minutes.  Cool for 10 minutes and remove from pan. 

Almond Wedding Cake Icing:
1 cup shortening
4 cups powdered sugar (confectioners, icing)
1 tsp almond extract
4 tbsp. milk

Combine all ingredients until smooth and creamy!  Ice your cupcakes by piping or spreading on with a knife.  Garnish with sprinkles or colored sugar or leave plain!

I hope you love these as much as we do!  It makes a ton, so be prepared to share!
 
Your "eats wedding cake in pajamas" Chefwannabe


Friday, February 22, 2013

Whopper Brownie Bites

Sometimes, one of my favorite things is to peruse (omgosh, my sister uses this word ALL the time and it drives me NUTS and here I just used it) the store, grocery store, Target, drug store, ANY store with food and see what I find on sale or on clearance and then write a recipe around it.  When my creative juices feel all dried up, it gives me inspiration. 

 
That is exactly what happened when I found this bag of Whoppers.  I seem to have these fond childhood memories of my dad making us "malts" in the blender as kids.  Not shakes, malts.  He used that wonderful malt powder we all know and love!  The Whoppers just confirmed that I needed to make something chocolate...malted....and delicious with them!   I will confess something, right here, and right now.  I have never made homemade brownies.  Yes, I know, shoot me now.  The good thing is, I will from now on!  This recipe from my mom is amazing.   I of course added some malt powder and such but, on the regular, you can bake these in an 8x8 pan!  They are SO fudgey which is how I like my brownies!

If you decide not to use liners, spray your mini cupcake pan liberally!  Don't forget or you will be serving them savage style, everyone trying to chip their brownie bite out of the pan at once!  Wouldn't THAT be fun!  I also piped my icing, you can just dollop it with a teaspoon, I am just obsessed with piping anything I possibly can.  It's a personal thrill.....leave me alone, don't judge. HA

Brownies:
1/2 cup butter (1 stick)
1/4 cup cocoa
1/4 cup chocolate malted milk powder
1 cup sugar
2 eggs
1 tsp vanilla
1/2 cup flour
1/4 tsp salt

Preheat oven to 350 degrees.  Using a mini muffin pan, add liners or spray liberally and set aside.  In a medium saucepan, melt butter completely.  Remove from heat and add cocoa, malted milk powder, sugar, eggs, vanilla, and salt.  Mix until completely combined.  Now add in flour, mix until JUST combined.  Using a teaspoon or small cookie scoop, fill each cup about 2/3rds of the way.  You should get 38 mini brownie bites out of this batter.  Bake for 12-14 minutes, until a toothpick comes out clean!  Let cool completely.

Chocolate Malted Buttercream:
1/4 cup butter (room temperature)
1 tbsp cocoa powder
3/4 cup powdered sugar
1/4 cup chocolate malted milk powder
1 tsp vanilla
1/2 cup SMASHED Whoppers (I mean smashed to dust or it will clog your piping bag if you are piping)
38 whole Whoppers

Mix all ingredients.  Place in a piping bag or use a teaspoon and add a small dollup to the top of each brownie.  Use a star tip or plain piping bag, or heck, use any tip you like!  Add a whole Whopper to the top of the dollop of icing!

Make sure to keep these sealed in a container to keep them fresh until you are ready to serve.  You could also freeze these!!

These are so good and will work wonders on your chocolate cravings!  ANYTIME!!

Your "do you whopper or don't you whopper"chefwannabe


Friday, October 19, 2012

Mini Minced Beef Pies

My husband spent a handful of his growing up years in England.  He talks so fondly of the people, the country, AND the food.  I like to try and recreate certain things for him, and myself (let's be real) that bring back good memories.  So I interrogate him about his travels and food experiences outside of the US.  I love hearing about his childhood which was so vastly different than my own.  I love making food that sparks memories of places he has been and lived. 


I am sure little pies are far from anything he may have eaten in England, but I tried my own take on minced beef pies.  He says they aren't TO far off from what he got at the local "chippy" .  Now if I could find a place to get him REAL English Sharp Cheddar cheese, I would be his hero for LIFE!  I did find some at Whole Foods and he liked it but it just wasn't QUITE right. 

I like things in "mini".  I like having individual portions, for portion control and because they are fun.  I swear it has nothing to do with being a germaphobe and someone else touching my food.  Anyway, let us get started.  You can buy pie crust or you can make my pie crust.  There is a link in the list of ingredients to my FABULOUS crust.  Just trust me on this kids, it rocks!

You will need:
1lb ground beef
1 carrot grated
1 small potato diced TINY
1 tbsp flour
1 cup beef stock
Pie Crust (1) Store bought or my FABULOUS recipe (makes 2 crusts, but just need 1)
Parchment Paper
1 egg (for egg wash)
salt and pepper to taste

Brown ground beef completely.  When it is done, if there is to much grease, drain it and add in flour, and carrots.  Mix completely until the flour is soaked up by the beef.  Add in stock and the TINY diced potato.  Stir until stock begins to thicken.  You may find you need a bit more stock, if so just add in as much as you like for a gravy.  Now cover your pot with a lid, turn off the heat and let it sit, until it is completely cooled.

Note: When I say dice the potato tiny, you could grate it (large grate) as well.  It should be tiny enough that the pieces cook through from the residual heat in the pot while it sits covered.  K?  K.

Cut strips of parchment paper long enough to go in the muffin tin and come out the other side, like this.  Spray your muffin tin with non stick spray and lay the parchment pieces in.  You will use it to remove the mini pies when they are done baking!


Roll out your pie crust.  Roll it a bit thinner than you would a regular sized pie crust.  I used a cup with a top diameter of almost 5 inches for this.  You want enough to be able to pinch your top lattice work to the crust, or to pinch the edges if you choose to put another piece on top for a solid top crust. You may not need one that big!  Cut out 12 circles and get them into the pan.  Make sure to press the sides and bottom edges on in to the corners!  Add in filling.  I used a small cookie scoop but just make sure it is divided between them all.  Take your leftover dough and do the lattice on top or if you have enough dough, or an extra crust, feel free to cut an entire top crust out.  Pinch the edges and brush entire mini pie with an egg wash.

Bake at 375 for approximately 30 minutes. 

You can easily make these with chicken, exchange the meat and stock.  They are delicious little meat pies using ground beef, for a budget friendly meal!

Your kids will love their own mini pie, and so will you!

Your "likes to have my OWN" chefwannabe
 

Sunday, January 8, 2012

Mini Pineapple Upside Down Cakes!

I just got home from having coffee with my sister.  You know, it really is nice spending time with people who you care about.  I hope nobody ever turns down an opportunity to connect with people you love.  You are never promised tomorrow and I get so aggravated when I hear people say they can't do this or that because they can't miss a television program or something equally as ridiculous.  What does that say to the person who has invited you to spend time with them?   I am done with my short speech.  We laughed, and we vented, and I managed to drink an entire pot of coffee by myself at 9 at night.  This is gonna be interesting!


My relationship with pineapple upside down cake has been a topsy turvy, stressful mess.  When I first met my husband, he had told me that his late mother always made it for him and this would be only his second birthday without her.  So to be a great girlfriend, I wanted to make him one.  I mean, isn't it obvious that it was what he wanted by telling me a week before his birthday?  I wasn't into cooking at this time so I was freaking out trying to figure out how to do it.  I had never eaten or even SEEN it.  When I got to the store, the heavens opened up, angels started singing and beam of heavenly light shone right on a box that said, "Pineapple Upside Down Cake, recipe on back".  *insert my traditional opera voice holding a note here*  So to make this story short, I made it, he loved it and I still make it as often as we feel we should have it.  I almost never put the cherries in the middle.  Stop hatin'.  I know it looks pretty and I KNOW it is traditional.  I hate maraschino cherries.  So I only put them in if I feel like being nice, or I remember to get them at the store!  
Tonight, I decided to start my husbands week off with a Sunday supper he would love.  All his favorites.  Ham, baked mac and cheese, etc.  Mostly I was excited to make him Pineapple Upside Down Cake.  We are trying to work on portion control so I decided to try to make little mini cakes.  I didn't want cupcakes, but figured it might be the only way to portion these puppies out.  Luck was on my side, they turned out awesome.  You know that really gooey, kind of semi hard stuff on the edges?  Well...you get ALL that stuff on your own little cake!  The edges are the best part of a pineapple upside down cake to me!  I was already informed by my husband they needed the cherry for color.  Yadda, Yadda, Yadda.  Trust me when I tell you, how you will forget all about your beloved maraschino cherry when you bite into this.  Remember, this is not a fat free or low calorie dessert.  Just in case for some reason you thought "pineapple upside down cake" implied it was.
-1 yellow cake mix (yes, I did)
-1 can sliced pineapple rings in     juice
-1 bottle pineapple soda

I am going to say to "prepare cake mix as directed", but WAIT!  Instead of using the water it calls for, use the juice from the pineapple rings.  That will not fulfill the entire measurement required so here is where you will use the pineapple soda.  (I got 1/3 cup of juice and needed 1 1/3 cups so used 1 cup of soda).  Mix until completely combined and set aside.  

1/2 cup butter (for 12 mini cakes)
2 cups brown sugar *may not need it all*
Pineapple rings cut into pieces
muffin tin

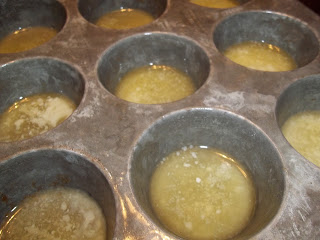
Melt your butter.  I used a glass measuring cup with a pouring spout.  Pour enough butter to cover the bottom of each muffin bottom plus just a bit more.  Use a pastry brush and dip it in the butter on the bottom and paint up the sides and on top a bit so the cake doesn't stick.

Next, using a regular teaspoon, add 1-2 tsp of brown sugar into each cake bottom.  When you are done, add in a few pieces of pineapple, just enough to cover the bottom.  

You will then add about 2 tbsps of batter on top of each.  Fill until a bit more than 3/4 full.  Bake as directed for cupcakes.  WARNING...you may not need them to bake as long since there is so little cake in them.  Just keep an eye on it.  

When they are done, remove from the oven and let sit 5 minutes.  I ran a knife around the edges of mine but I didn't really need to.  I used a fork to carefully get down under them and lift them out.  Flip it over so the pineapple is on top and there you go.  INCREDIBLY delicious!

See how the barely rose?
The cake has the most subtle pineapple flavor on its own.  I only wanted to make 12 so I used 3 small disposable aluminum pans and threw the rest of the cut up pineapple in the leftover batter, and baked up 3 small loaf cakes.  I will freeze them and whip up a little drizzle when I need them!  These didn't rise much at all so they have a great mini cake look and not an upside down cupcake look which I just love!  
I hope you give these a try.  I don't think you will be disappointed!

Your "pineapple Gods are turning in her favor" chefwannabe